

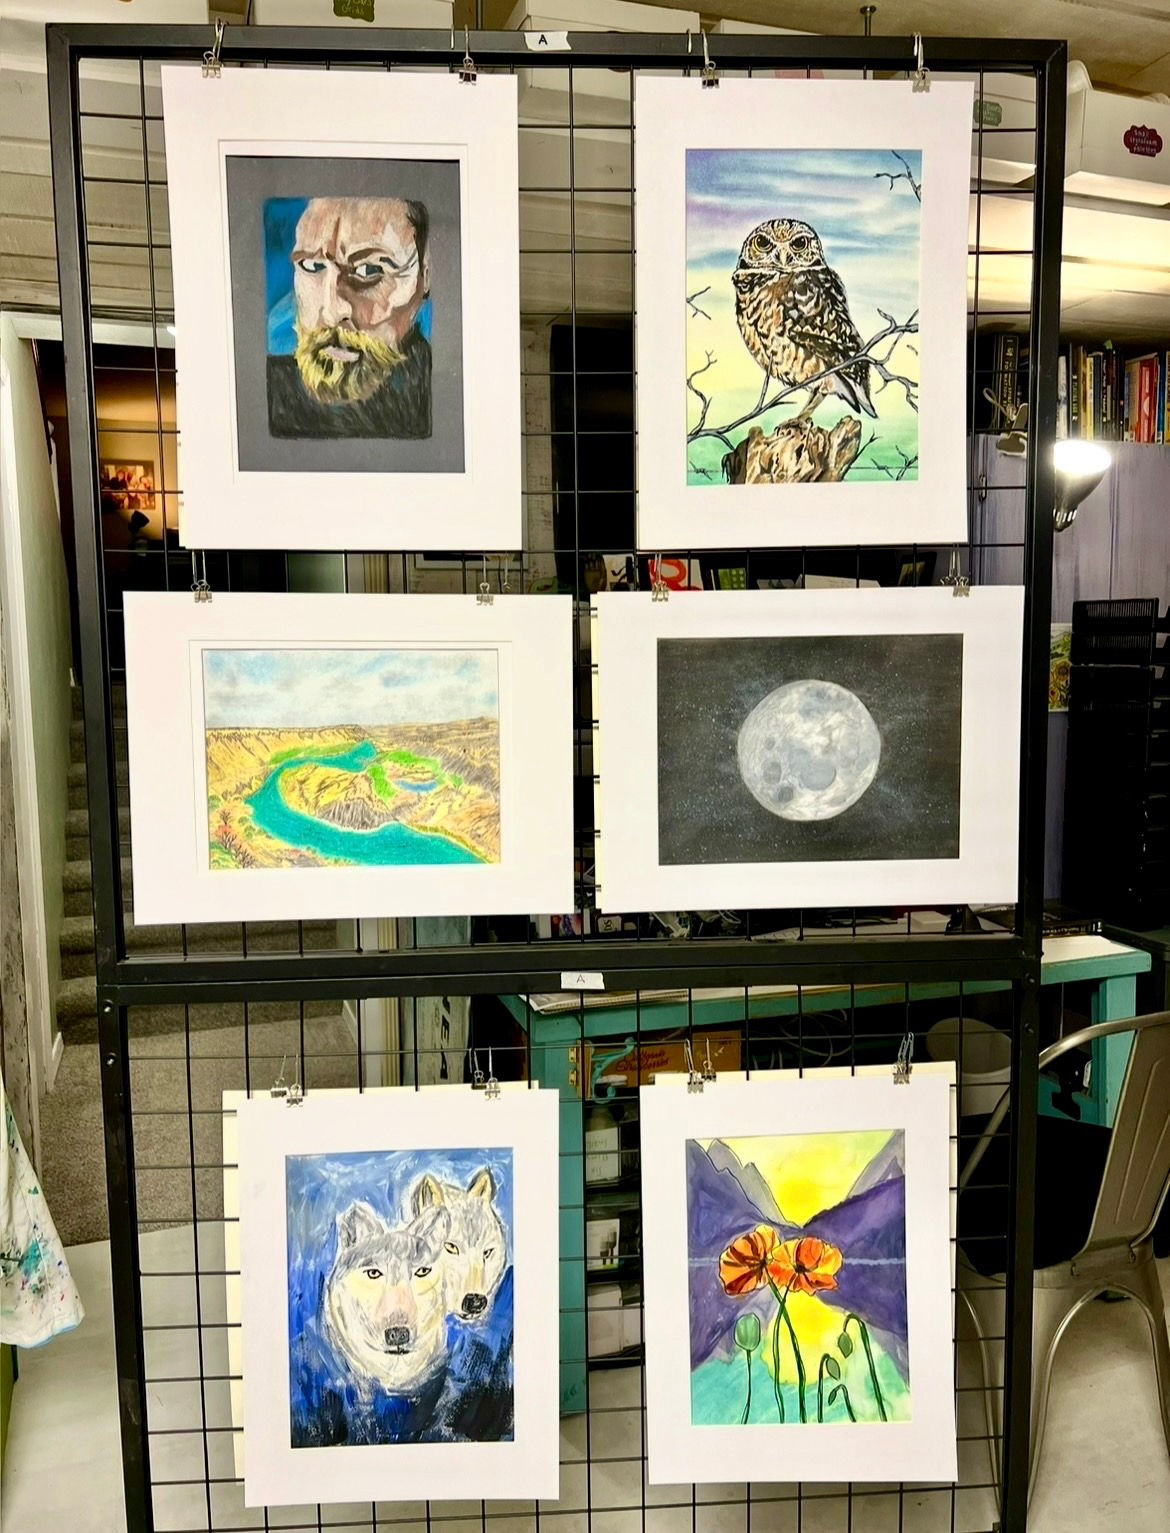
An inexpensive, flexible way to exhibit matted artwork without framing everything.
When Amy and I began organizing art exhibits for the residents in the prison where we teach art, we needed a hanging system that was affordable, portable, easy to set up, and simple enough for volunteers to help with.
We also need to bring everything into the facility ourselves, work within prison security requirements, and make the artwork look beautiful without spending a fortune on frames.
Our solution?
Paper clips and mini binder clips!
I know. Very glamorous.
But sometimes the best solutions are the simple ones.
What we use
- Freestanding metal grid display panels with wheels
- Regular metal paper clips (smooth silver)
- Mini binder clips (silver)
- Pre-cut white mats to fit 9 × 12-inch artwork
- A small box with lid for storing the hanging hardware
We use silver binder clips because they visually recede from the display. The more common black ones stand out and distract from the art.
The silver clips are inexpensive, easy to replace, and surprisingly versatile.
How the hanging system works
We thread a paper clip through one handle of a mini binder clip, leaving the other handle accessible so we can open and close the clip.
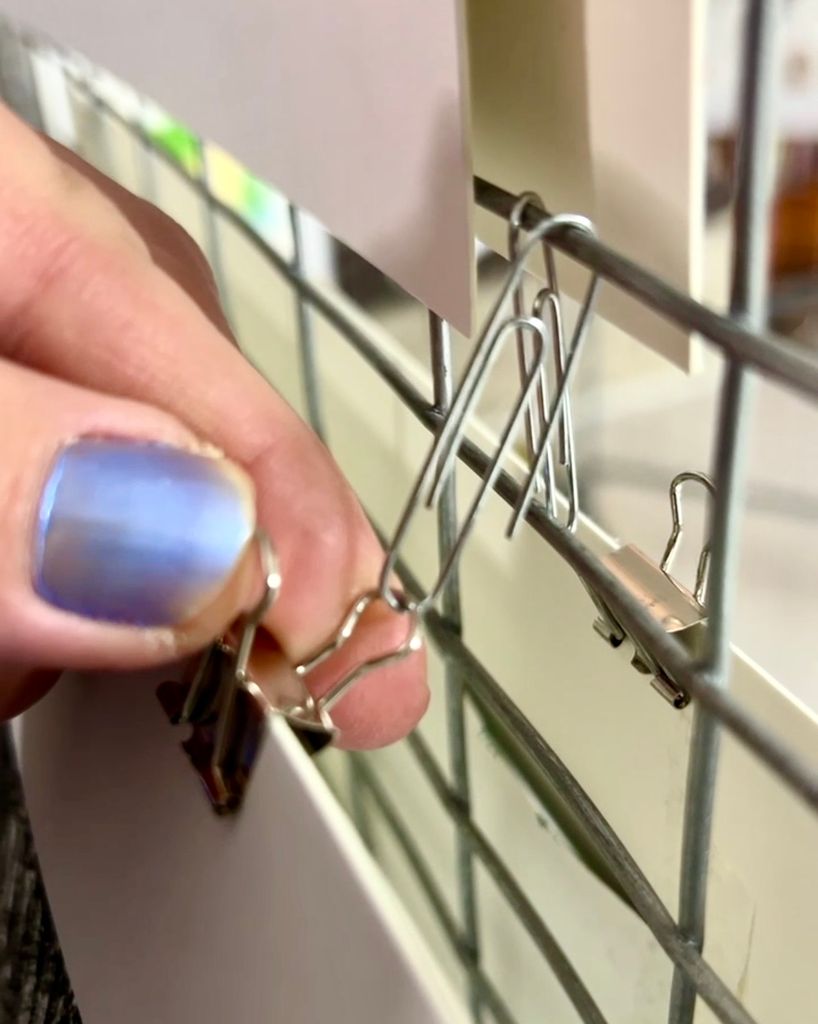
The paper clip hooks over the horizontal wire of the display grid, while the binder clip holds the edge of the matted artwork.
We use two clips per piece to keep it hanging securely.
The important trick is to orient the binder clip so the accessible handle faces outward. That way, we can attach and move the artwork easily.
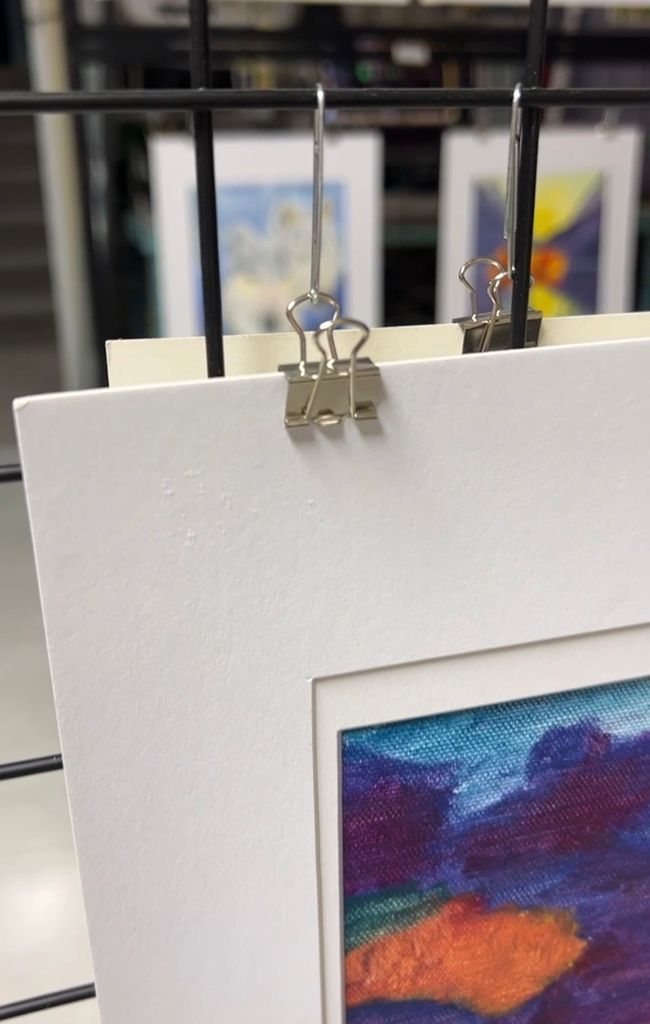
Because the hardware is so small, it nearly disappears, and the artwork takes center stage.
And because the clips can move easily, we can adjust spacing as needed.
Displaying art on both sides
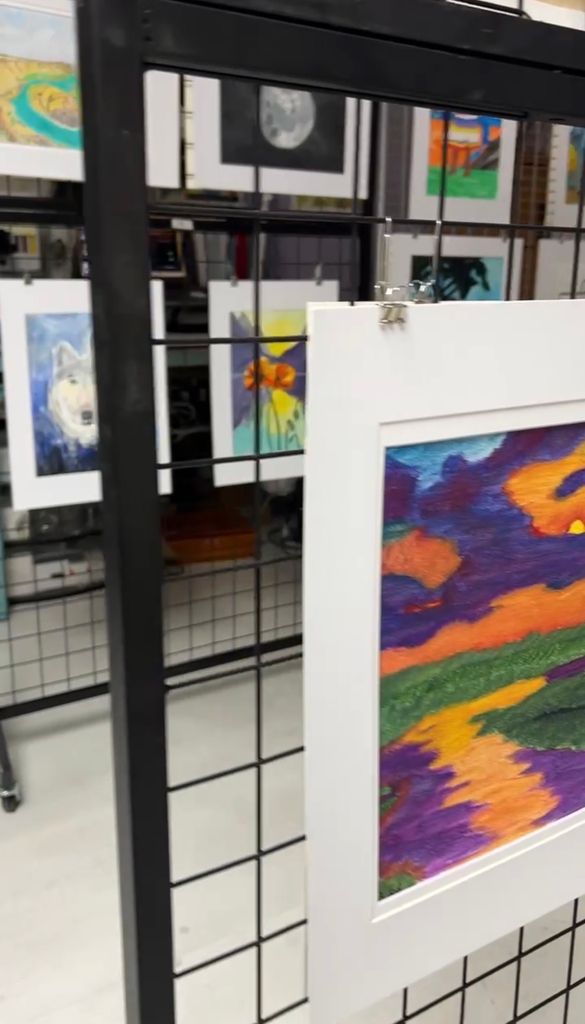
Our panels are double-sided, so we typically hang artwork back-to-back at our exhibits. People walk around both sides of the panels to see the art.
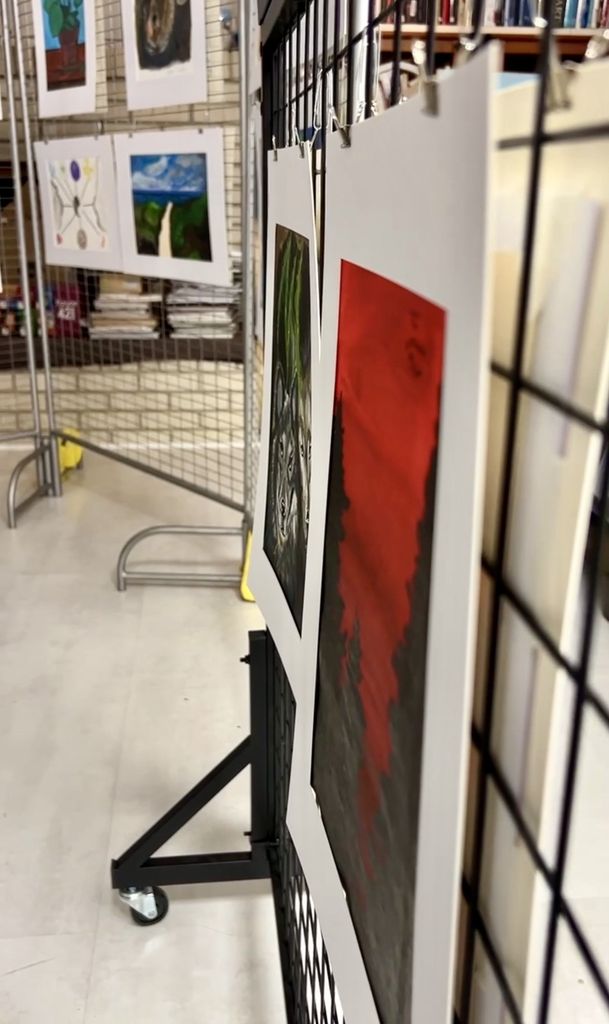
This allows us to display more pieces while keeping the backs of the artwork from showing through if a window happens to be behind our panels.
We mat the art with pre-cut mats that perfectly fit the 9 × 12-inch mixed media paper our students create on.
Along the front bottom of each mat, we attach a small card stock label with each artist’s name, using a small loop of artist tape that we’ve made less tacky by pressing it briefly against a rag or denim jeans.
This helps protect the mat’s surface from tearing, since we reuse the same white mats at every show. After the exhibit, we carefully remove the artwork from the mats and return to the artwork itself to the student who made it.
Open Mic at the Exhibit
Twenty minutes into each exhibit’s opening reception, we host a twenty-minute Open Mic to welcome guests and speak about the show. Artists who are willing can briefly talk about their art, their process, or what they’ve learned.
Since the artworks can be unclipped easily, an artist can temporarily remove a piece during Open Mic to show the audience while they’re talking about the piece.
If panels are on wheels, we can temporarily spin the whole panel to show the opposite side as the artist is talking.
Planning the arrangement ahead of time
One of the biggest time-savers is doing the curating and arranging all the art on the panels at home before exhibit day.
We arrange it, take photos, label each panel clearly with tape (A – L), then print our photos, one sheet for each panel. Notice the “A” labeled at the top of this panel.
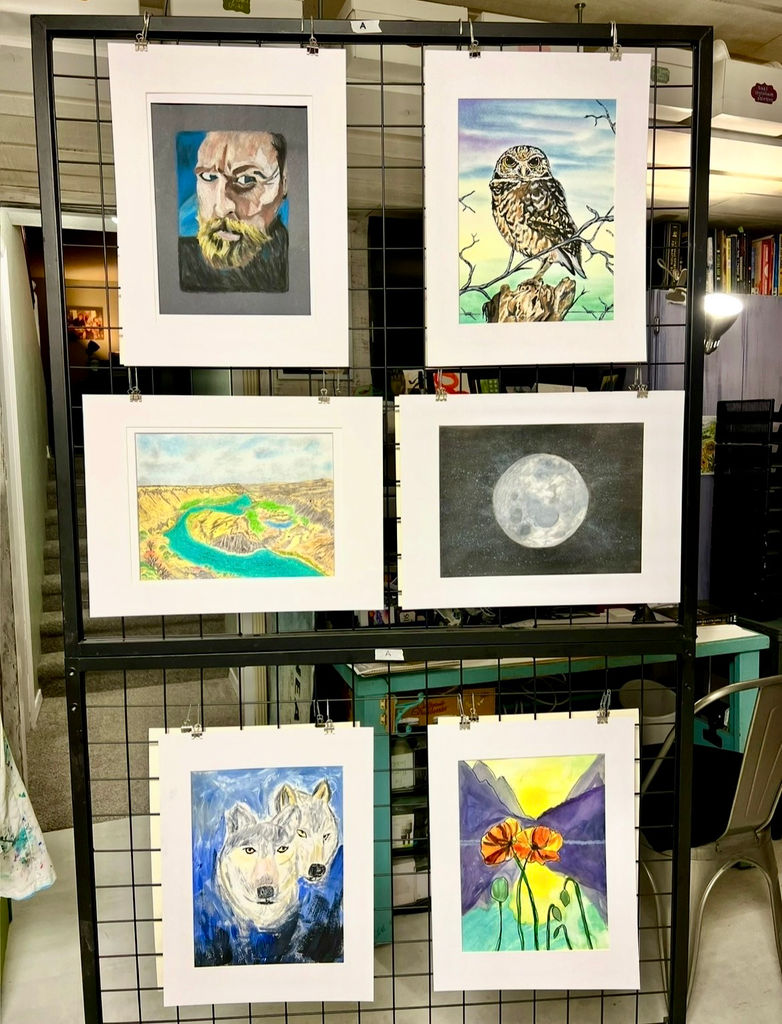
Because we can’t bring our phones into the prison, those printed layouts are essential. We box up the artwork flat, and clamp each mini binder clip to the metal panels during transport so the clips stay where they’re supposed to go.
When we arrive, we aren’t deciding where every piece should go. We’re simply recreating the arrangement we’ve already planned.
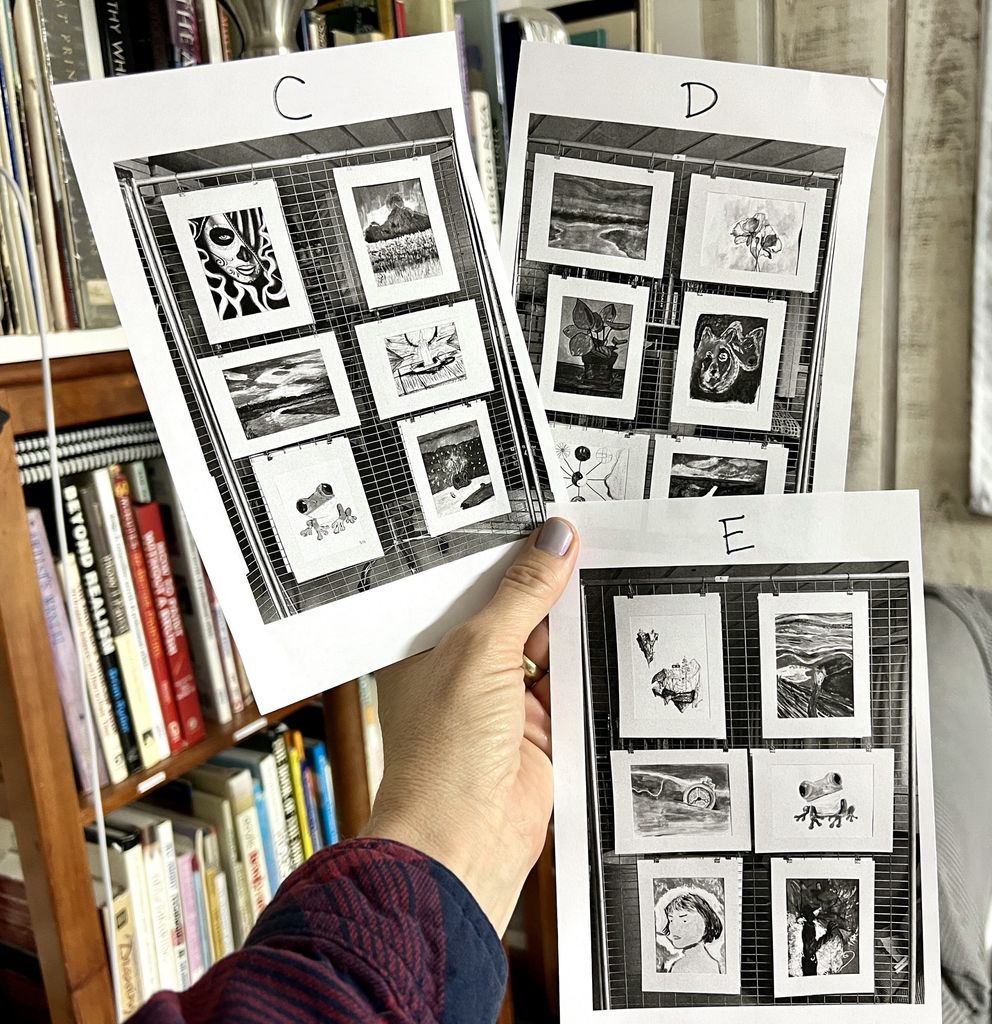
Our display uses six double-sided panels, giving us twelve surfaces for artwork.
The system also allows the artists and other helpers to assist with hanging and taking down the show once we’ve demonstrated how the clips work.
That’s one of my favorite parts.
The exhibit isn’t just something Amy and I put on for the artists. It’s something they help create.
A few more things we’ve learned
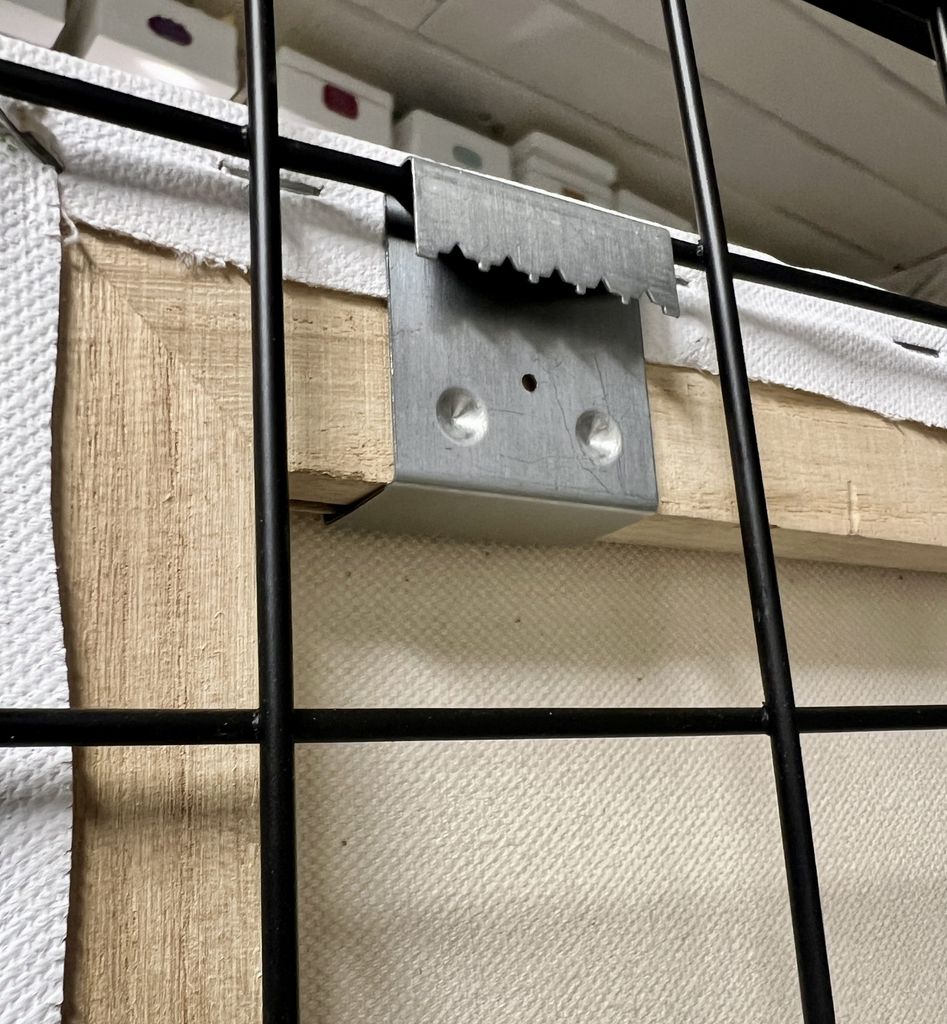
For canvas pieces, we use small sawtooth-style hangers that attach to the canvas and hook over the grid.
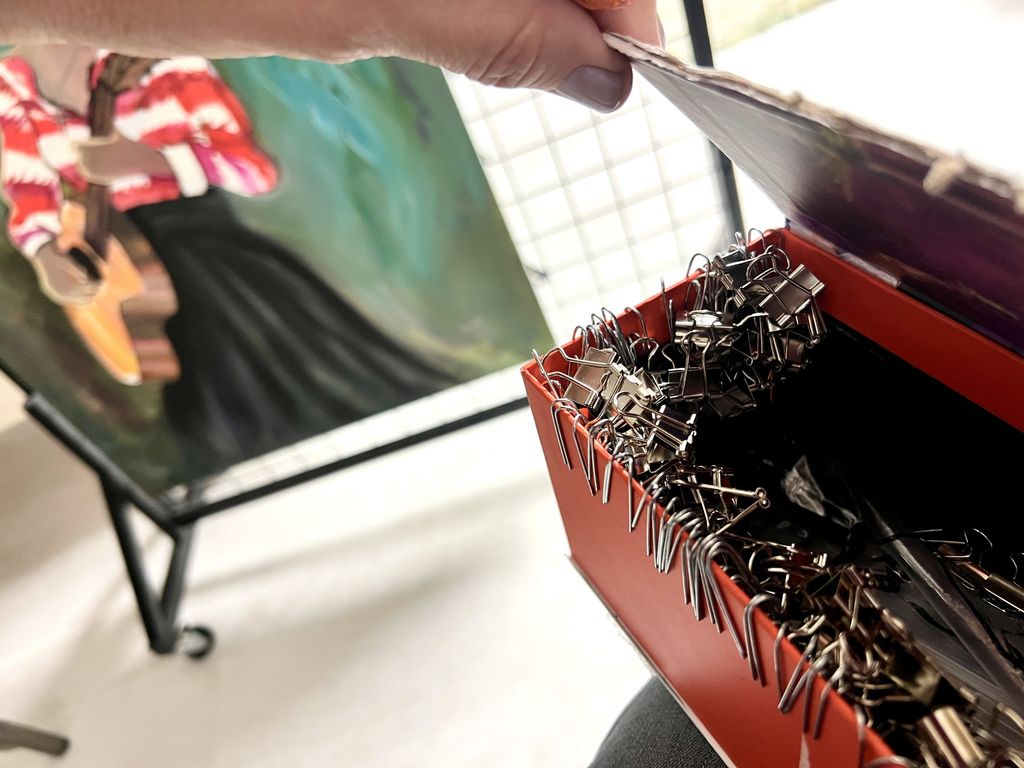
And we keep the paper clips and binder clips hanging on the edge of a small, sturdy lidded box so they don’t become a tangled mess.
Simple materials, meaningful results
There’s nothing fancy about this system, but it works beautifully for us.
The artwork gets the attention, the hardware stays in the background, and the whole exhibit can be assembled and taken down without complicated equipment.
And there’s a larger lesson here, too.
Sometimes the limitations we face become invitations to think creatively.
That’s something Amy and I have been learning well beyond our hanging system.
In fact, our most recent prison art exhibit gave us quite a few opportunities to practice flexibility, patience, and faithfulness!
Leave a Reply